
How to read a label on a wine bottle using computer vision ?
Welcome, in this article I will walk you through my journey in building my very first computer vision project ! The goal here is to make the computer read the label of a bottle of wine from a simple photo. Why is this complicated, you may ask? Well, first of all, we can’t call directly an OCR (Optical Character Recognition) library like tesseract, because the text on the label is distorted on a cylinder and because of that, we can’t extract correctly the characters and thus the words and sentences. To achieve this we will need to split our problem in different specific tasks to successfully read what’s written on a wine bottle label. But first we need to explain to our machine what is a wine bottle label and how to detect it.
My innocent image processing approach
During my initial research phase I stumbled upon a great mathematica forum post where the author tries to do more or less the same task but on marmalade jars. In this process the author uses different image processing techniques to try to locate the position of the label. So of course I tried to replicate this using python, opencv and my own wine bottle photos. Let’s take this photo as example:
First of all, this photo has a huge benefit from a computer vision point of view: There is a lot of contrast between the label and the background, we can hope for some good result if we try to isolate the label with image processing.
So let’s dive in the process to detect the position of the label: First we convert our image to grayscale and apply an adaptive threshold function that is going to help us simplify the structure of the image. to only take into consideration the contrast of the image.
This adaptativeThreshold function parameters are very important in the success of this method and the goal is to obtain that thick contour line around the label. I had to iterate and find the parameters that worked for me: {blockSize : 35, C : 4}. Once this is done the next step that I’ve found useful is to blur the image a little bit to smooth the image contours and apply a simpler binary threshold to only get white and black colors. In this steps the parameters are also tuned manually to have the best result possible.
Once we can clearly see the contour of the label we can hope the the Canny function available on opencv will draw all the detected edges on our image and allow us to select precisely it’s location by using the findCountours function ranked by biggest area:
And here we go, we successfully found the relative location of our label so we can start working on it and hopefully read what’s written on it !
… Wait, let’s first try our algorithm on other photo, surely it will works on other images.
… And yeah it does not work at all on other images because every context is unique and our algorithm is parameterized to work on the image we selected initially. We now need to find a systematic solution to this problem that works in a generalized context.
U-net: the magic solution
After my first failed attempt with the first method I was starting to doubt that I could find a way to do this with OpenCV only, when I stumbled upon a forum post where someone was trying to do almost the same thing as me but for labels on postal items. One of the response to this issue grabbed my attention:
I then started to research about U-net and how I could implement it. Basically I have to manually create a corresponding black and white mask (the target of the U-net) to every label shape image (X) I have in my training set like so:

That’s where the fun part began where I had to do like 2/3 hours of photoshop in total to create label masks for 163 photos ! Once that was done I found a tensorflow implementation of this network architecture. Here is a description of the network architecture from Wikipedia:
The network consists of a contracting path and an expansive path, which gives it the u-shaped architecture. The contracting path is a typical convolutional network that consists of repeated application of convolutions, each followed by a rectified linear unit (ReLU) and a max pooling operation. During the contraction, the spatial information is reduced while feature information is increased. The expansive pathway combines the feature and spatial information through a sequence of up-convolutions and concatenations with high-resolution features from the contracting path.
And this is what the tensorflow implementation looks like (ignore the Config file it is something I setup for my own package):
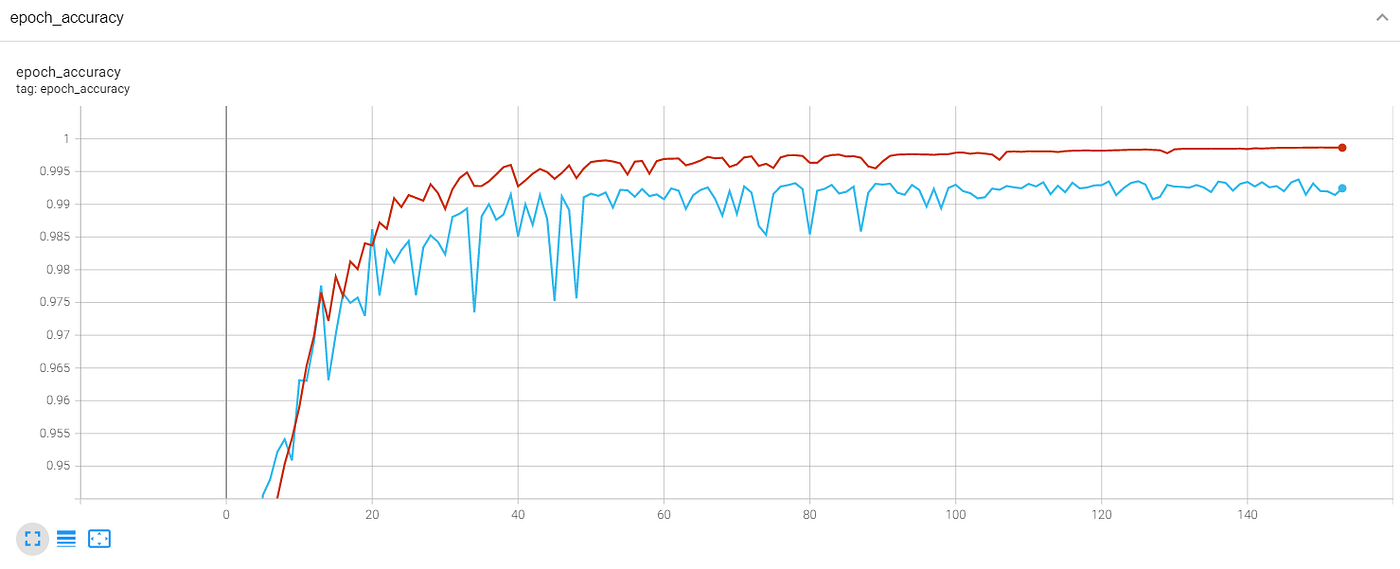
I trained the network on my own NVIDIA GeForce RTX 3060. After about 10 minutes the validation accuracy start to converge around 99%.
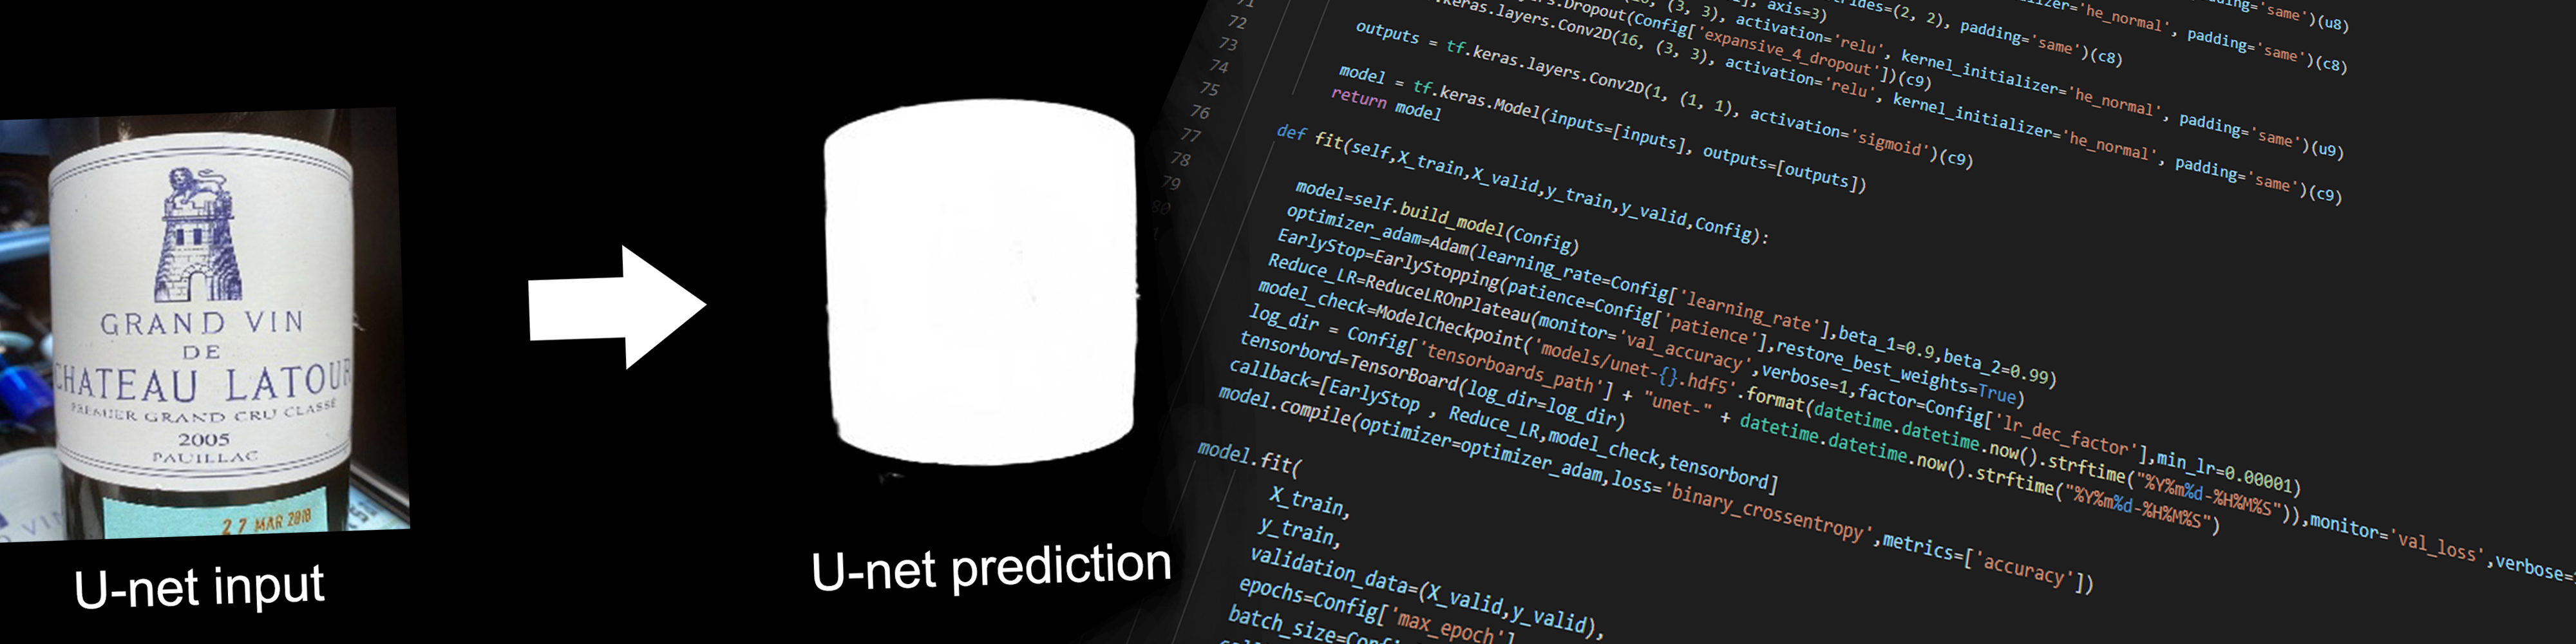
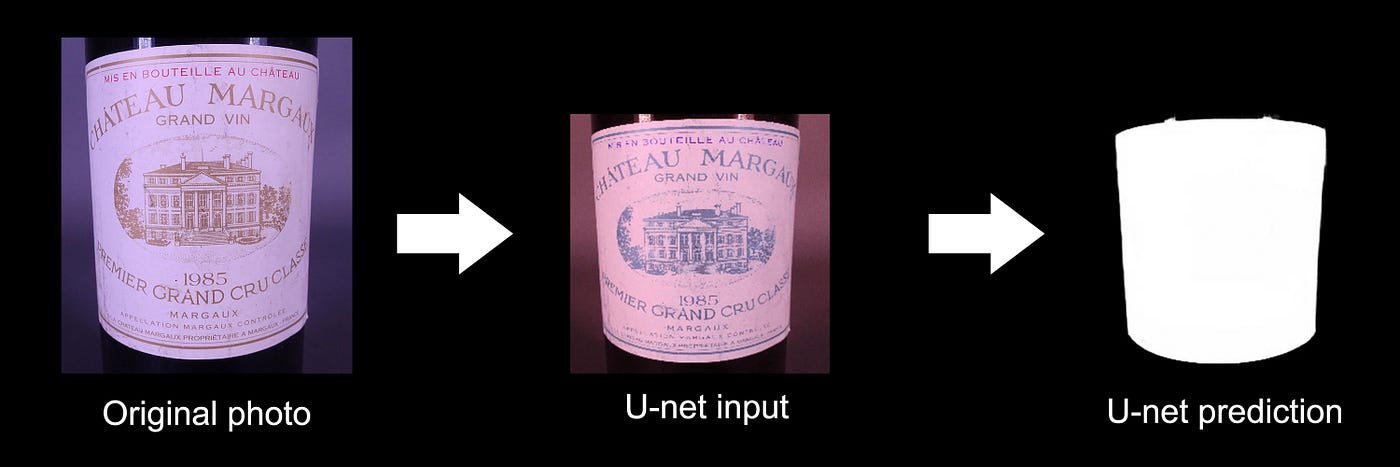
Let’s test our model on a few out of sample photos to see how our network perform in real condition.
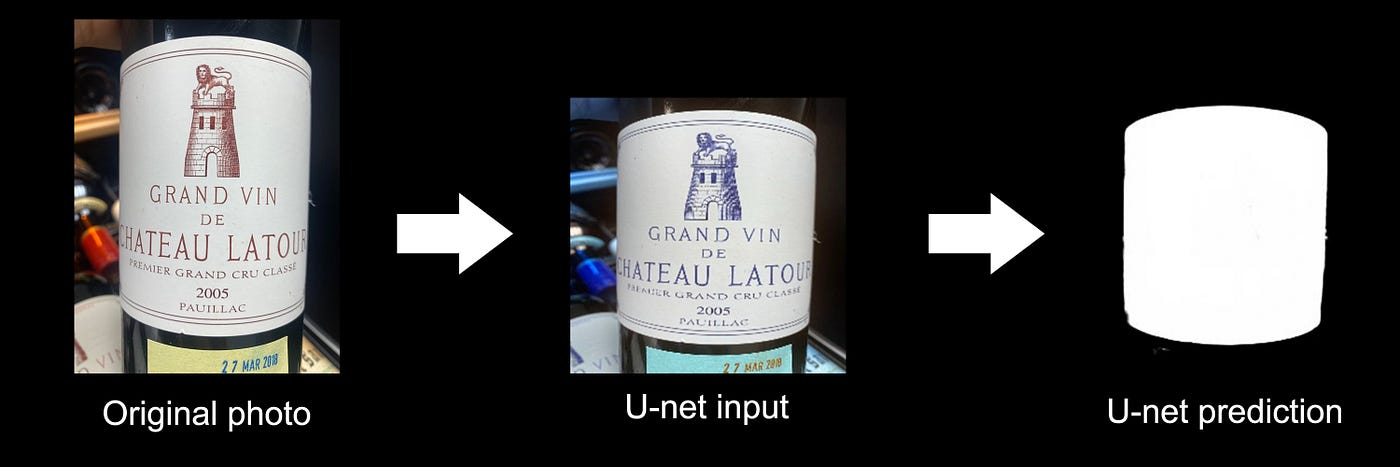
As you can see here everything works as expected, the input of the network has to go through a little bit of pre-processing to be a squared shape and be in BGR color format. Once the prediction mask is obtained we only need to resize it to have the pixel coordinate of our label (white pixels).
Here the network also works relatively well except on the little light spots that are mistaken to be a part of the label.
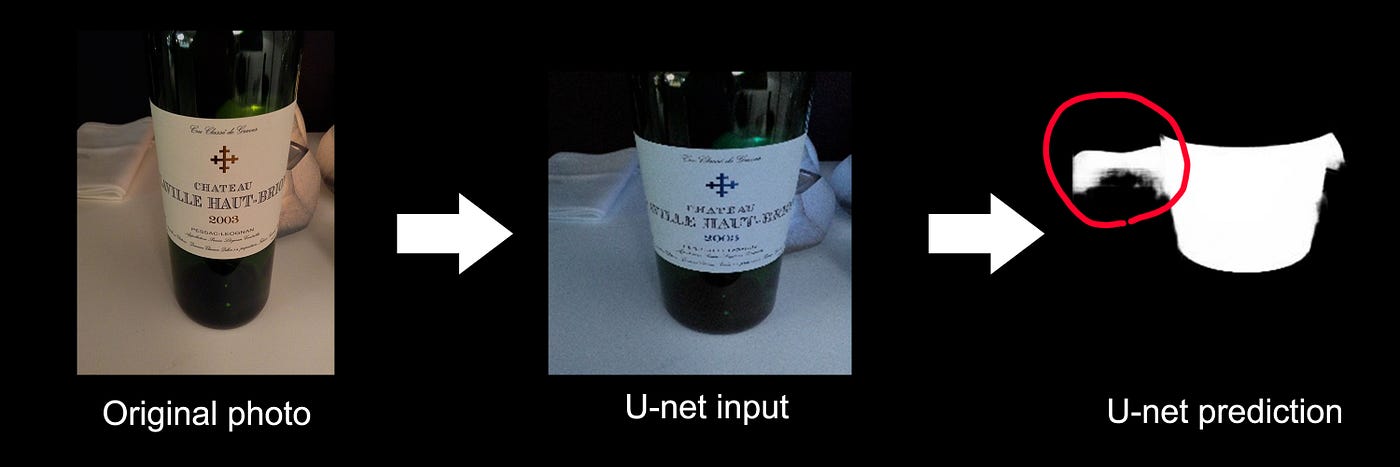
In this example with a book next to the bottle we see that the network gets confused and include a part of it to the shape of the label. Even if it’s a pretty robust method there is still some room left for improvement. For this project I will use this method to detect the label and to avoid error like this as mush as possible I will give photography guidelines (center label / no rotation / good lighting / good background contrast) to minimize the amount of errors the network is doing.
The label unwrapper
During my research, I had the chance to stumble upon an awesome github project by Alexey Zankevich that does exactly that. Before using his repository and write this article, it’s important to mention that I asked him a formal authorization to use his code and mention his work in this article.
I will not explain in detail how his library works because I simply did not code it and I do not master the geometric concept he uses, but in simple words the library allows to “unwrap” the wine label by positioning manually 6 points around the edges of the label cylinder. Then the code is generating and mapping a lot of points that follow the estimated geometry of the cylinder and to apply an interpolation of those points with the scipy library to a destination map that is geometrically flat. By doing this we get a visual approximation of a flat label.
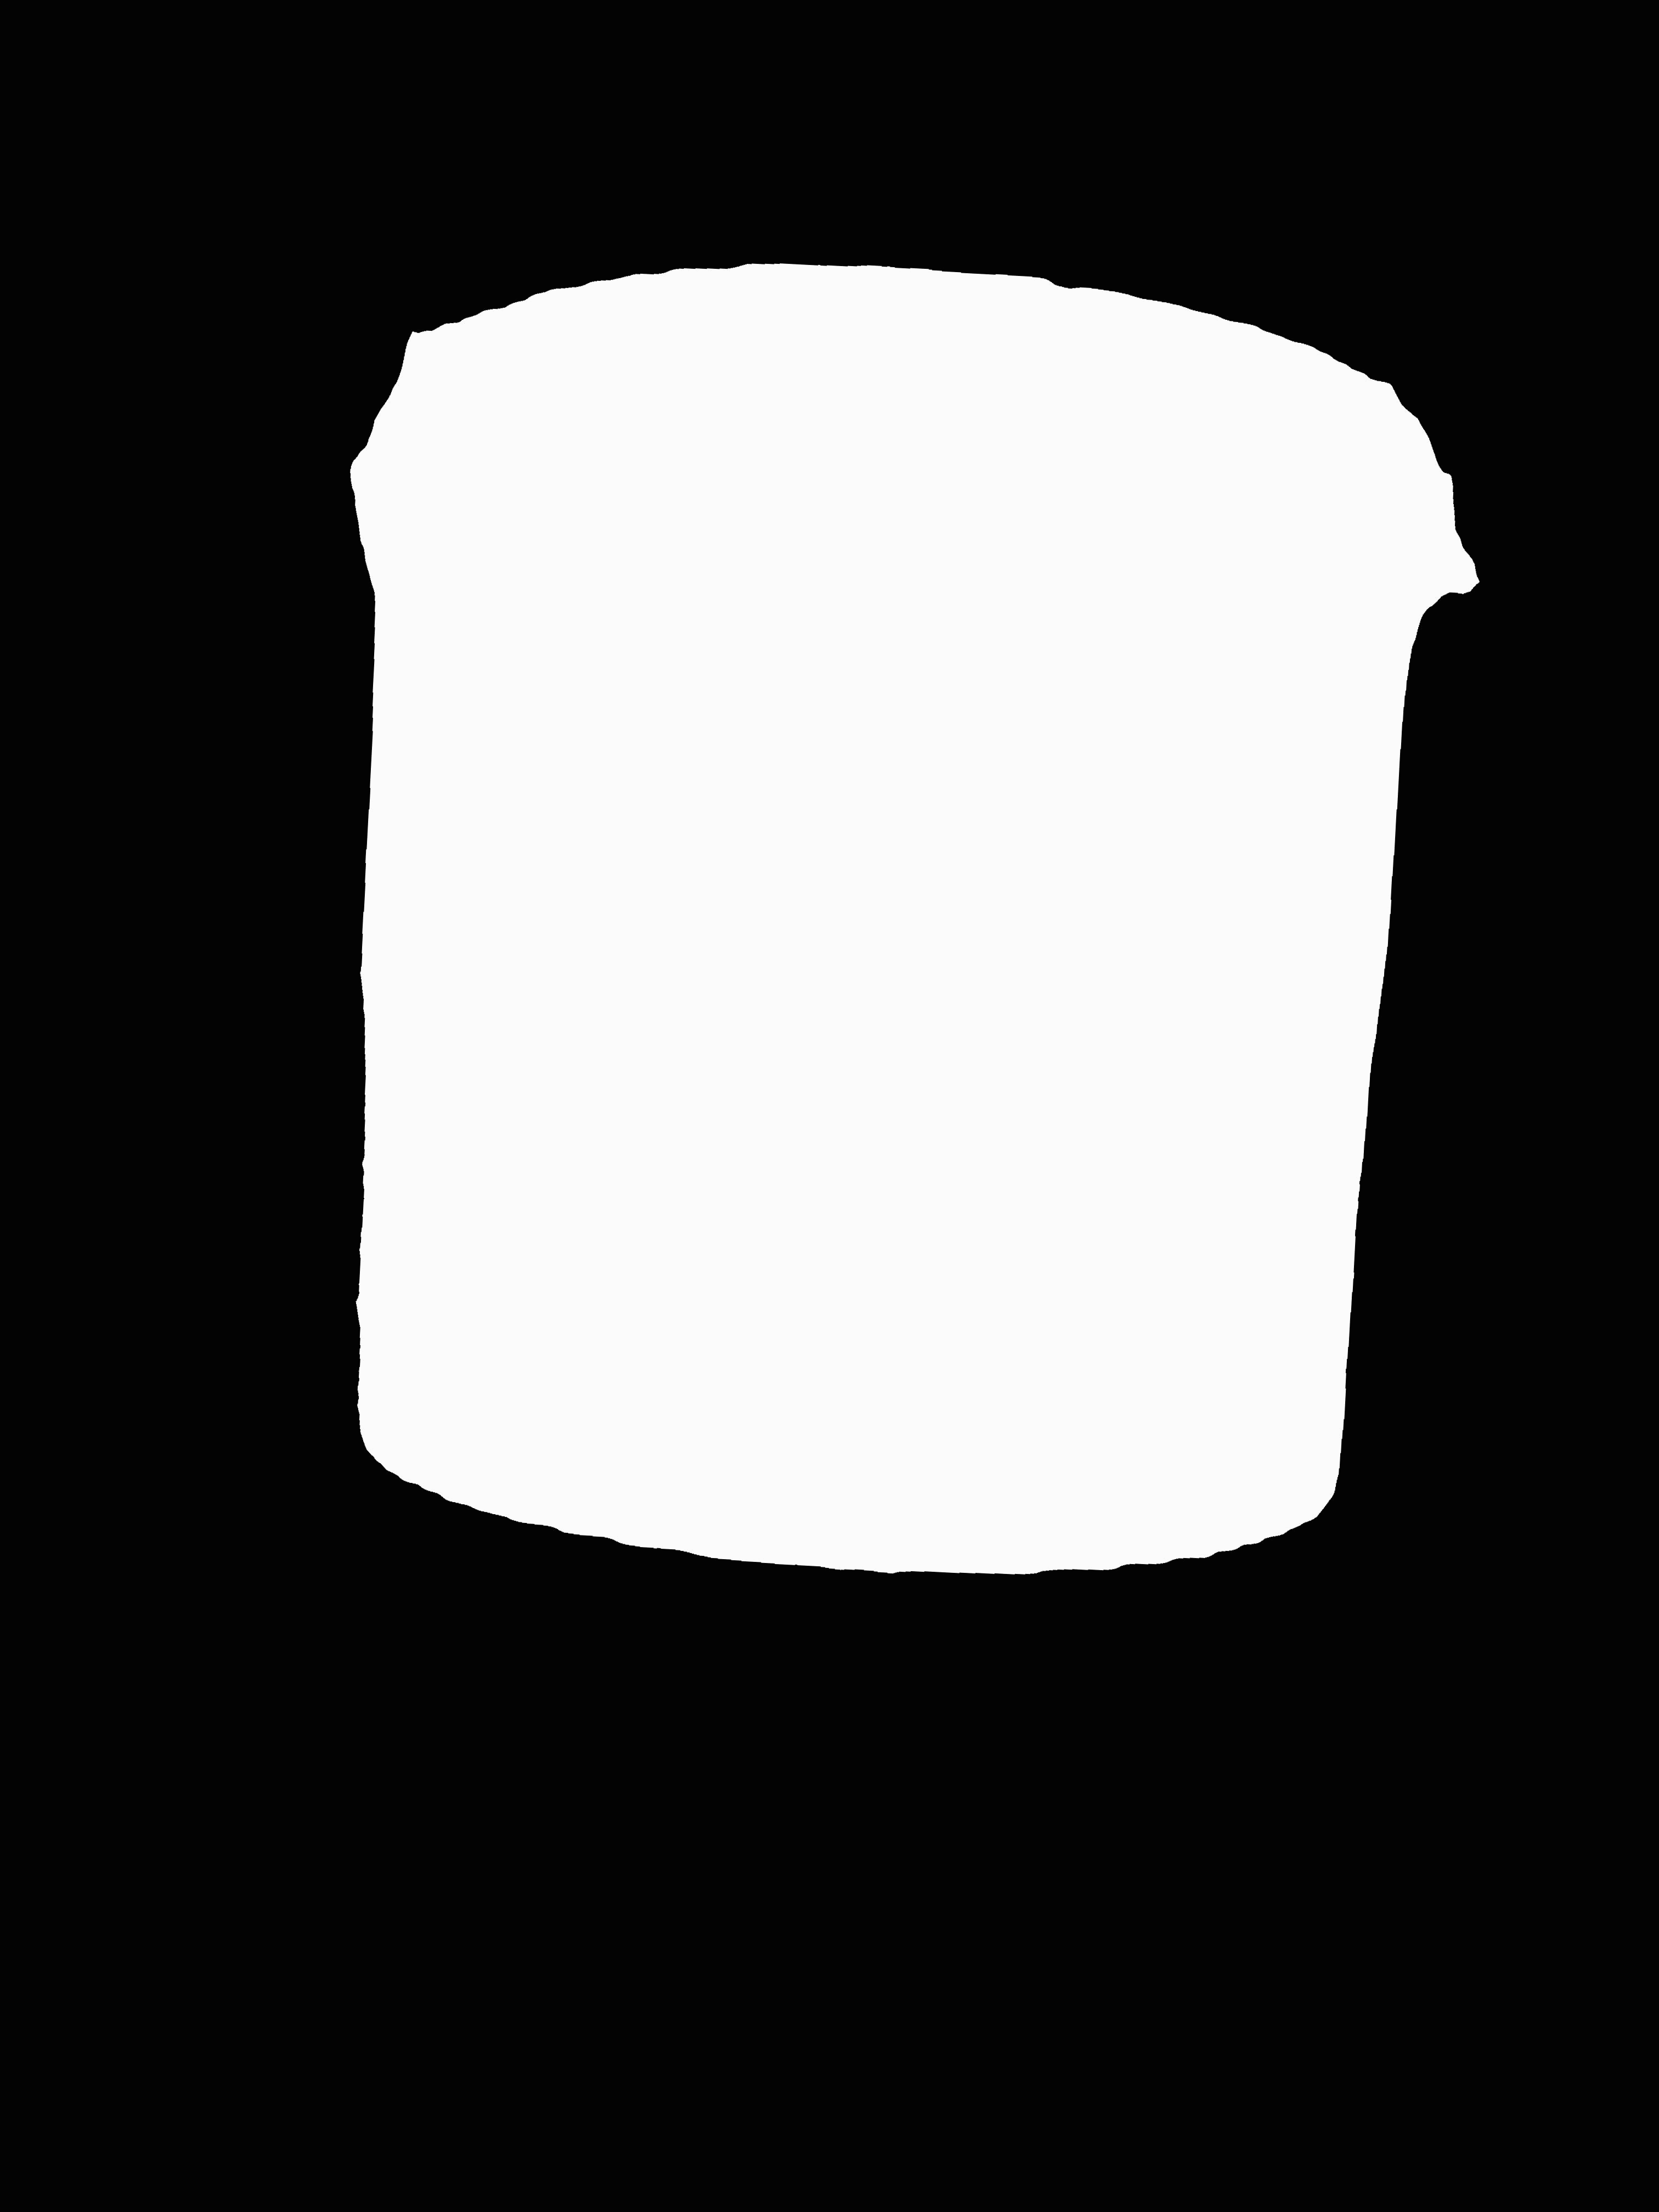
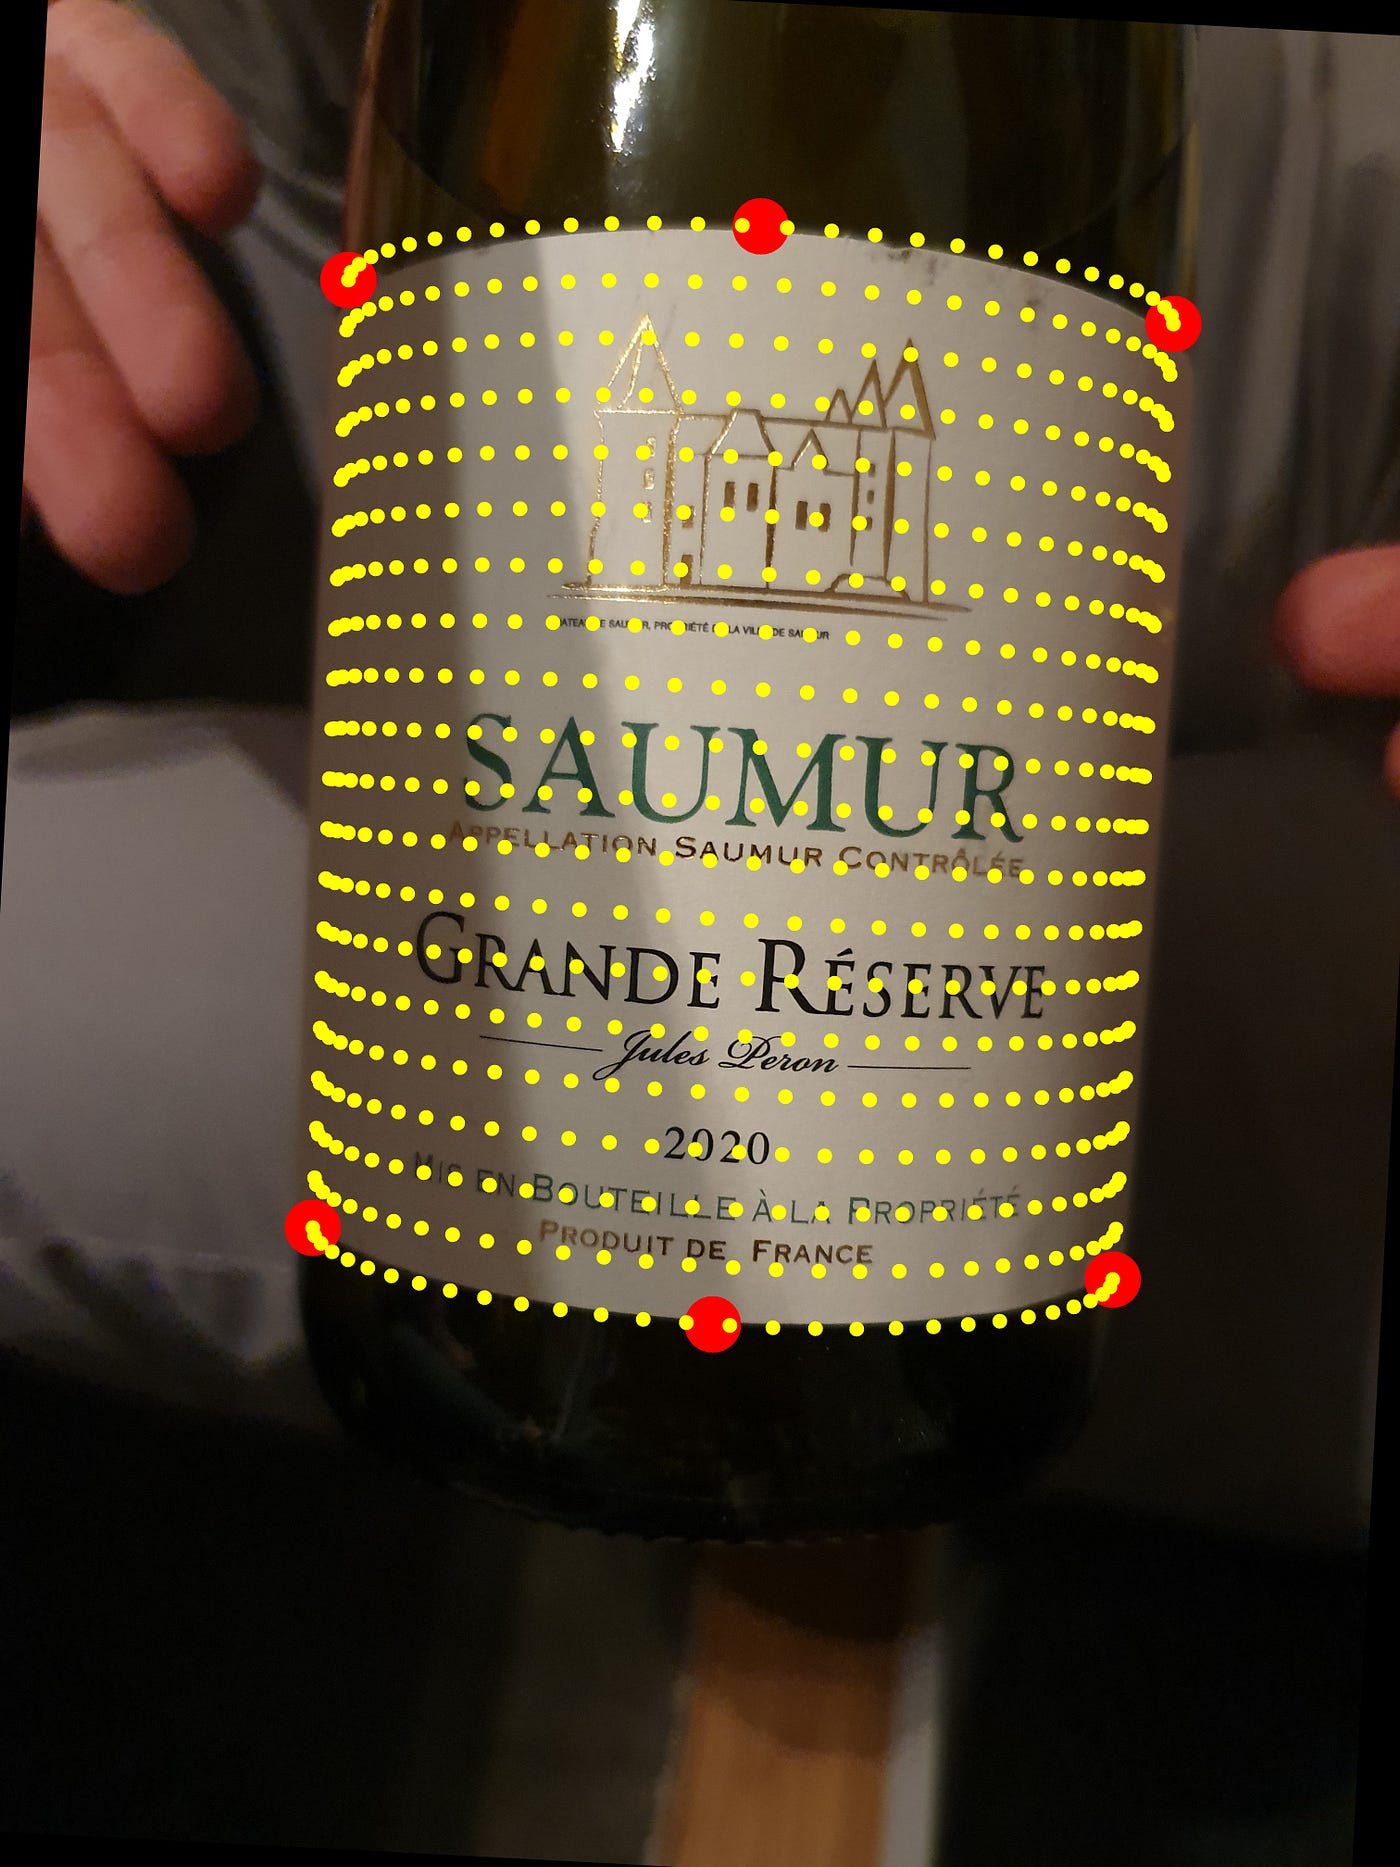
The thing is that we need to find a way to automatically position those 6 points on our U-Net image prediction. Let’s take one photo example we will use until the end of this article:
Once we get our U-net prediction we need to reshape it back to the original source photo size, that way once we find our 6 point coordinates we can place them correctly in the original photo. Also we want the label to be vertically aligned and we only want binary colors (black or white pixels). To do so, we use this bit of code from the readLabels method of the package.

A few words about the vertical align algorithm I implemented, it simply tries to maximize the number of fully black columns so here you can see we cannot say that the alignment is perfect because there is some imperfect detection of the shape of the cylinder, but I choose not to take a perfect example to show that it works in imperfect scenarios.
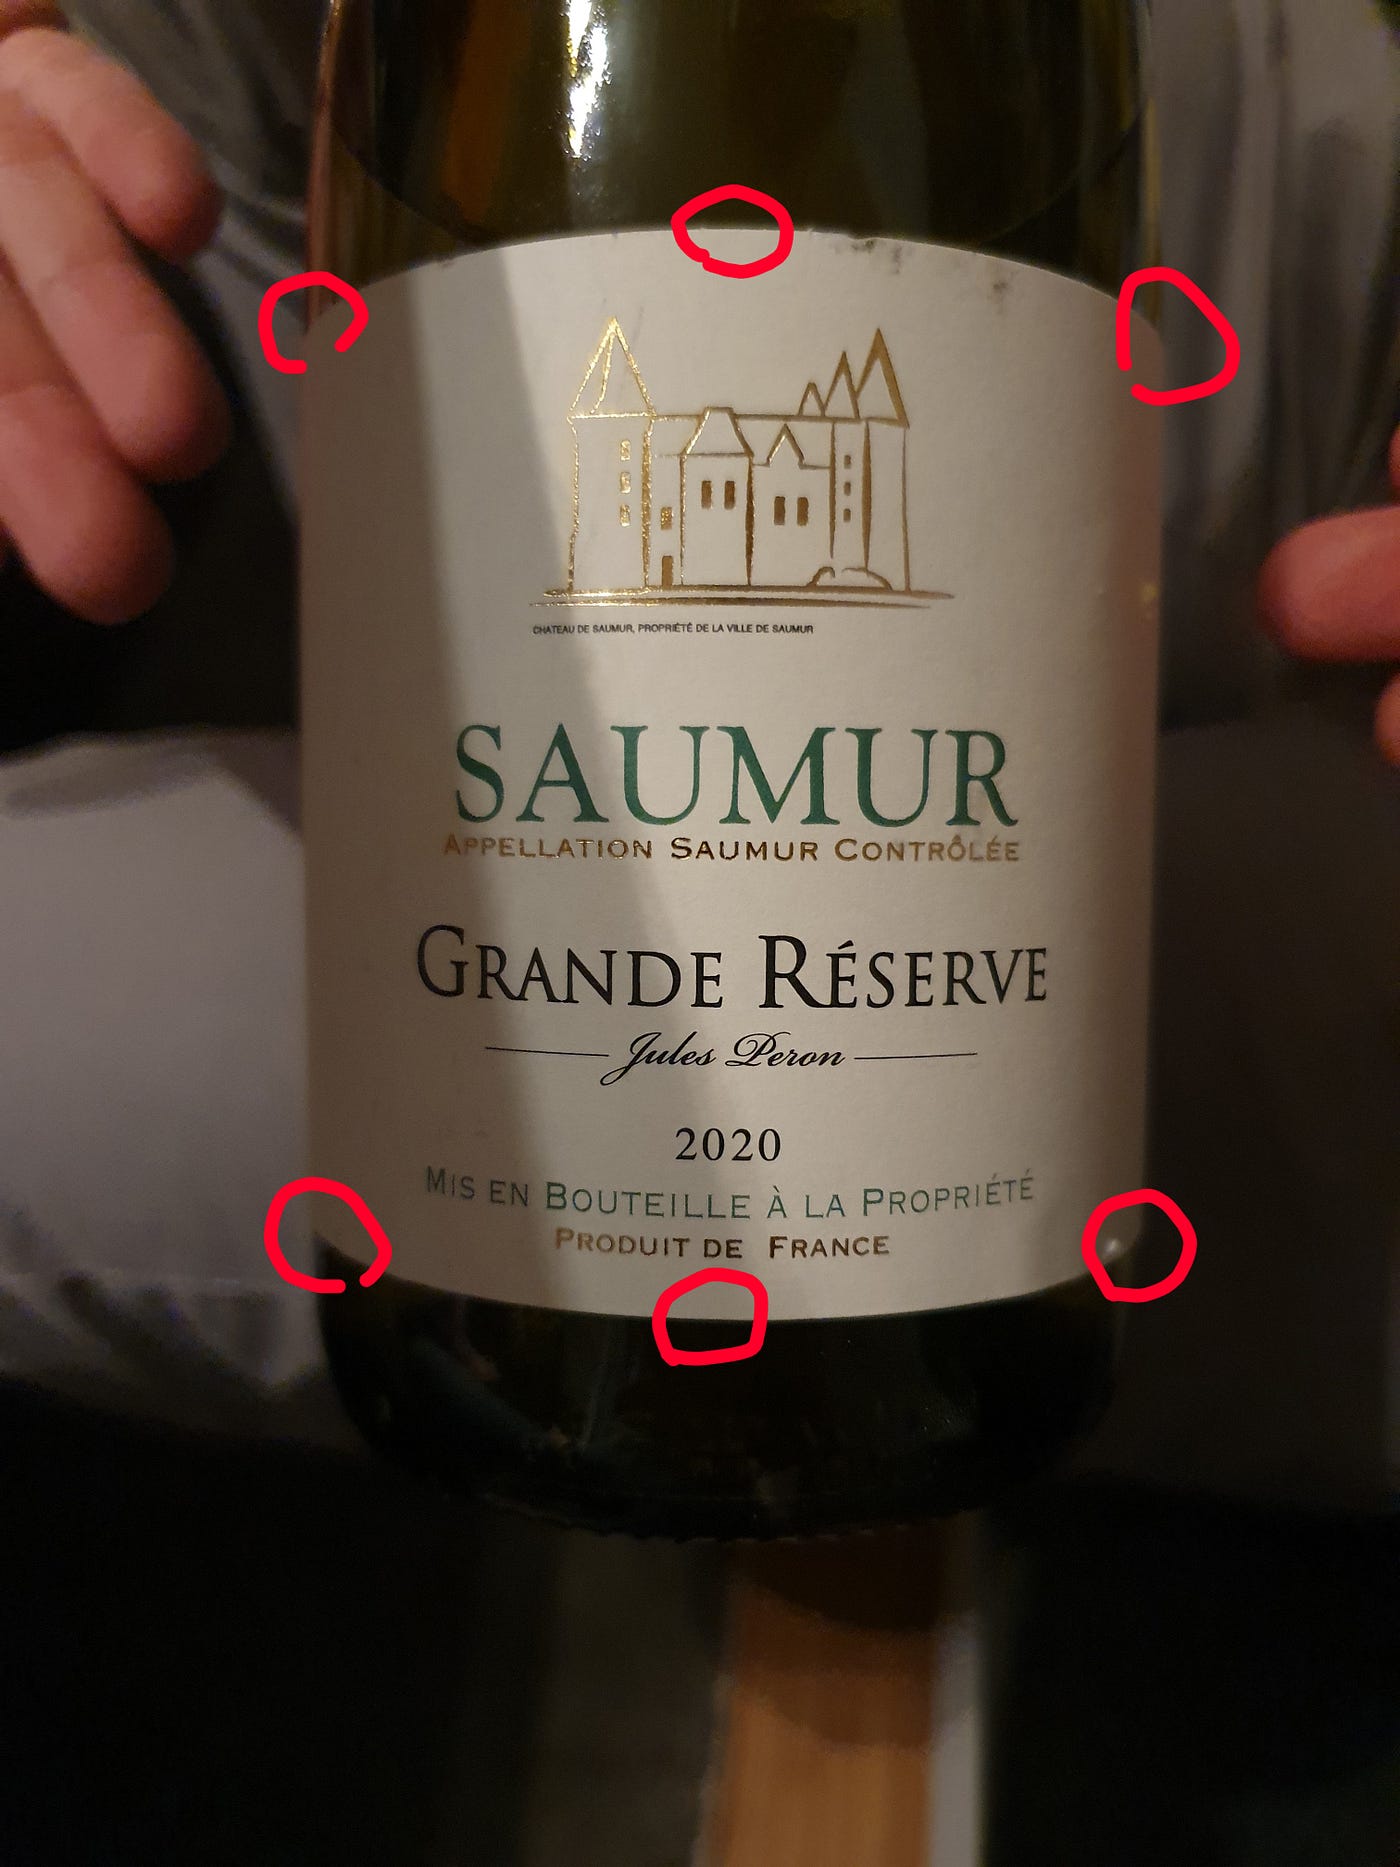
So now let’s talk about the way I managed to estimate and position the 6 points we need to use the unwrapping label code. My idea was to find an iterative way to detect the corners first, As with the vertical align algorithm I used a logic of “full black column” as a condition to keep iterating, so basically: Scan from side to side and stop as soon as there is a column with at least 1 white pixel in it etc… But the problem was that I did not manage to find all corners with this logic because usually the cylinder has perspective and thus either the top or bottom part is bigger than the other…
And then I remembered about matrix diagonals ! What if instead of iterating with columns and rows, I could find a way to iterate with diagonals like so:
This way I’ll be able to find A,C,D and F coordinates points with diagonals and find B coordinate by calculating the simple distance:
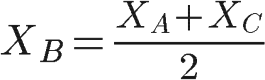
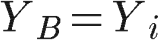
Where XB is the X coordinate for the point B. We can now select the column vector (lambda) of the image corresponding to this XB position:
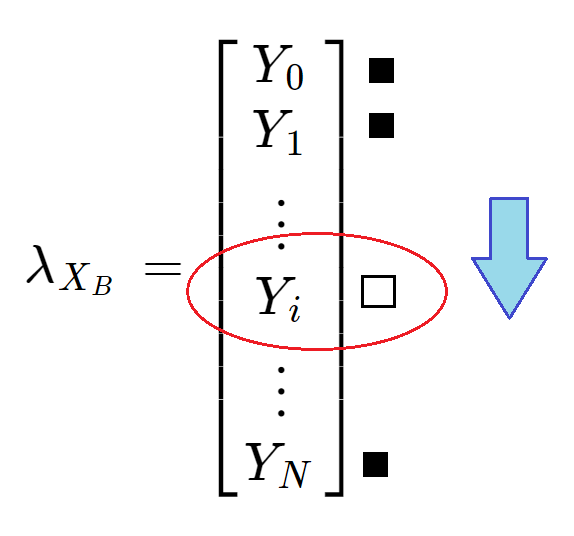
We iterate from top to bottom in our vector to find the first white pixel to deduct the Y coordinate for the B point.
The logic is the same for the E point: we find the column vector in the middle of the D and F point and this time we iterate from bottom to top until we find our first white pixel.
To get the detail of the implementation, please check the method getCylinderPoints from the package.
Now that we have our 6 coordinates, we can use the “unwrap label” code.

TADA ! And finally we now have an almost perfectly flat label to try to apply the pytesseract OCR library on it. To see the difference between the original (curved) image and the flatten one I put both OCR transcript to demonstrate that we did not do all this work for nothing !
Original image OCR:
PPELLATION SAUCE CONTROLEE DE RESERVE _ftes Lo 2020 BBOUTEILLE A LA PROPRIETE p PRODUIT DE FRANCE
Flatten label image OCR:
GHATEAY DE SAUMUR, PROPRIETE DE LA VILLE DE SAUMUR AUMUR LLATION SAUMUR CONTROLEE DE RESERVE 2020 BOUTEILLE A LA PROPRIETE | PRODUIT DE FRANCE
So it is absolutely not perfect but there’s definitely an improvement. The photo in itself has some lighting difference that seems to affect the OCR. Here are a few other examples I tested:

R ORDEAUX SUPER! ERIEUR APDE LLAT 1ON BORDEAUX SUP
Flatten label image OCR:
GEREAN D VI N DE 5 O8R De EeARURX Day DEMEURE DU BORDELAIS MOULIN DE JAURE +S a (co) BORDEAUX SUPERIEUR APPELLATION BORDEAUX SUPERIEUR CONTROLEE
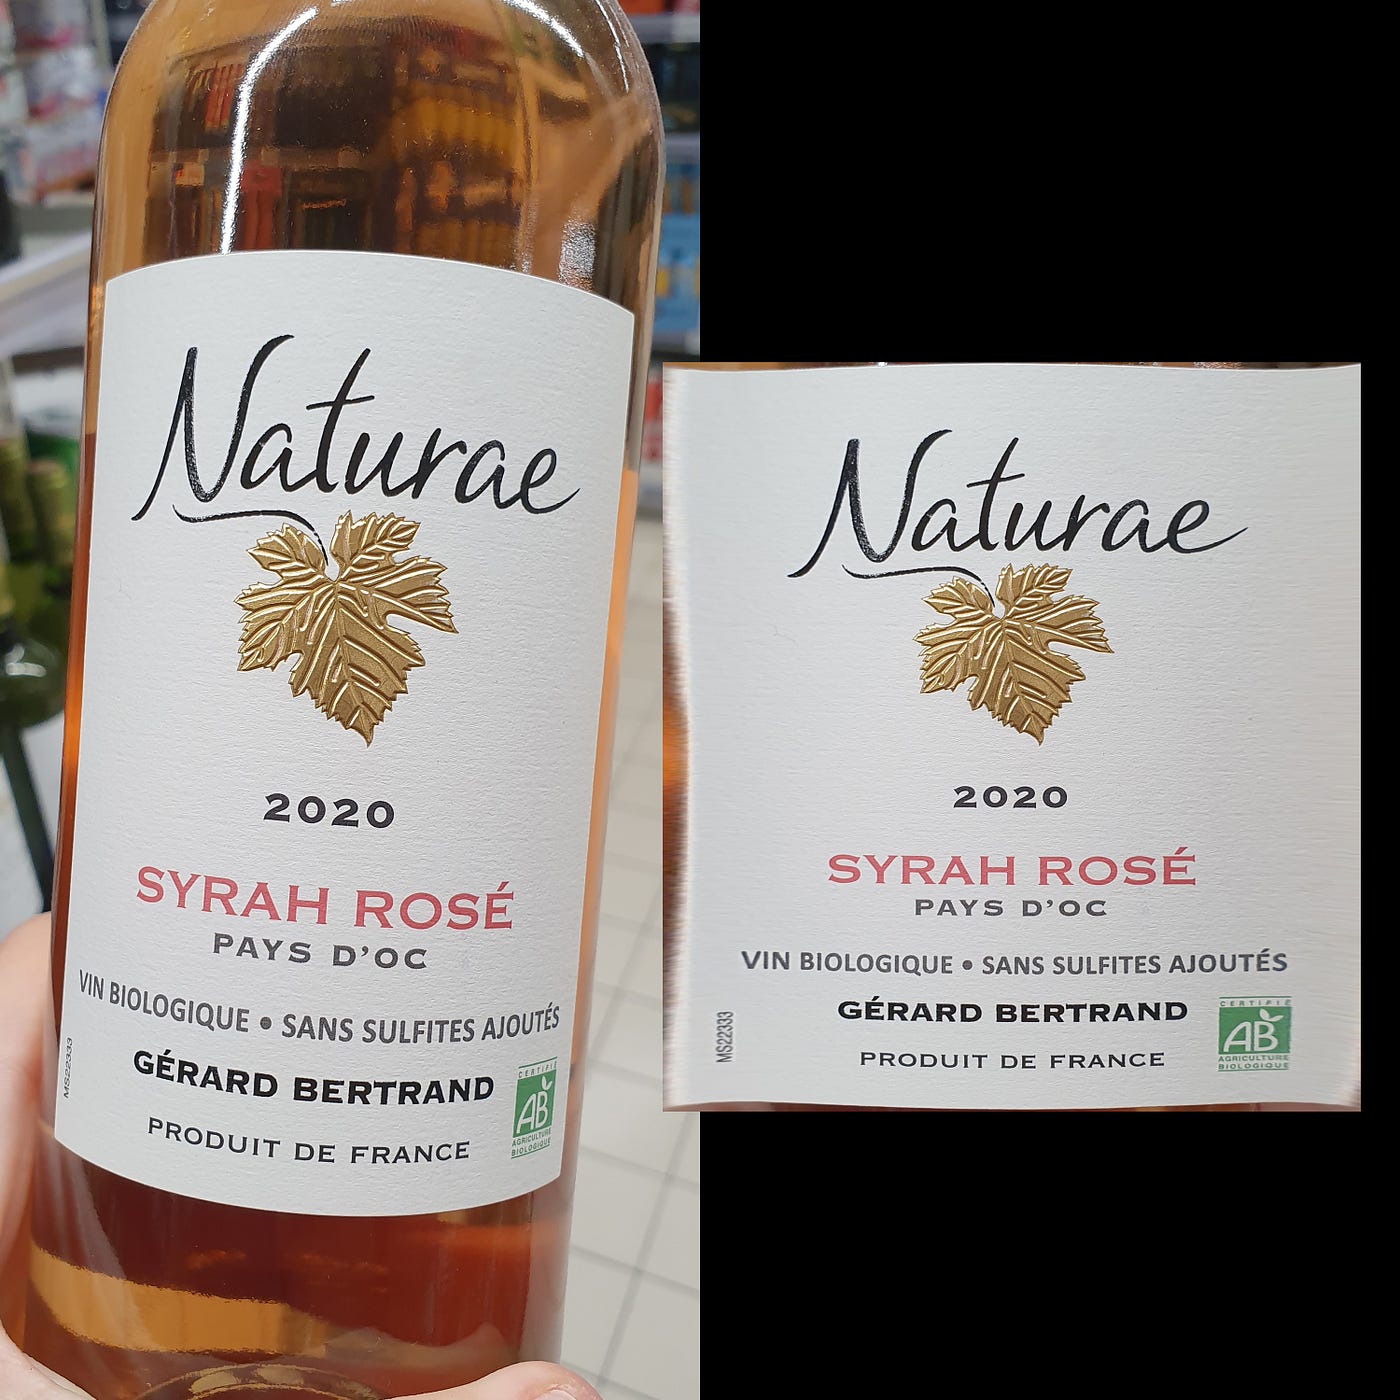
Pav | i YS dD’ : = UE e : : SANS SUL : EITES AJOUTES ARD BERTRAND at Fence oL0 oul poo : p R O D U IT DE F RA NCE
Flatten label image OCR:
MS22338 2020 SYRAH ROSE PAYS D’OCc VIN BIOLOGIQUE e SANS SULFITES AJOUTES — — — CEeRTiFre GERARD BERTRAND AGRICULTURE PRODUIT DE FRANCE = sos:
And I think we are done for this article about my first computer vision project, I hope you enjoyed it and as you may have spotted it, it is far from perfect and some of the steps can be optimized:
- The corner / edge cylinder detection is one way I proposed to solve this algorithmic task, but I’m sure maybe another solution can be found.
- The OCR part in itself is a pretty lazy work on my end, it can be better optimized by using something else than the default configuration and maybe add one more image processing steps to reduce shadow / lighting or background object that could create some noise.
- The Label shape detection U-Net is far from perfect in its predictions and often fail to find a geometrically correct cylinder, I’m sure experimented computer vision engineers will find a way to improve its efficiency with more deep learning work or image processing techniques.
If you have some suggestions to improve this solution feel free to contact me. You can test the application with your own wine bottle photos by clicking on the button bellow (Keep in mind that they should have a good resolution, have the less perspective possible and a high contrast background with the label).